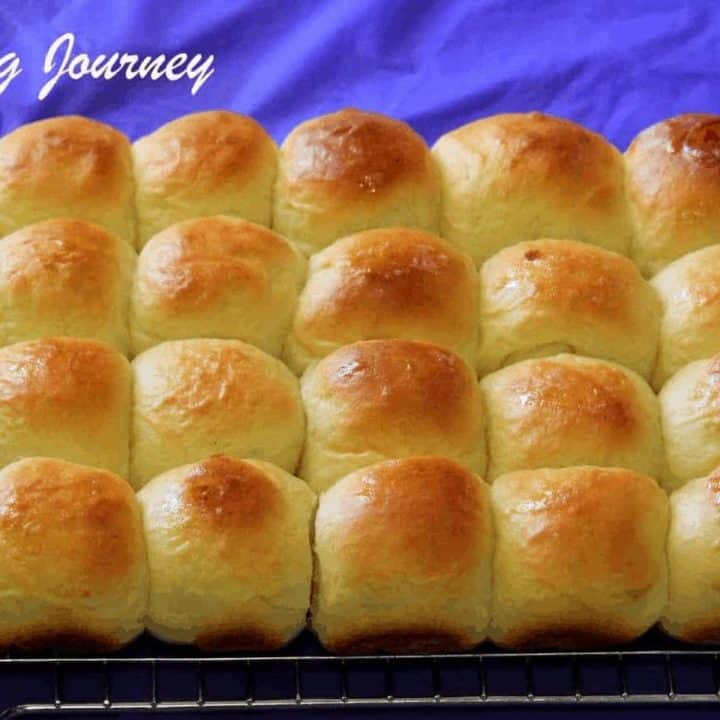
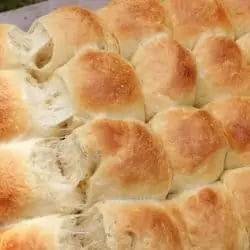
Hawaiian Buns | King Hawaiian Sweet Buns | Hawaiian Sweet Rolls
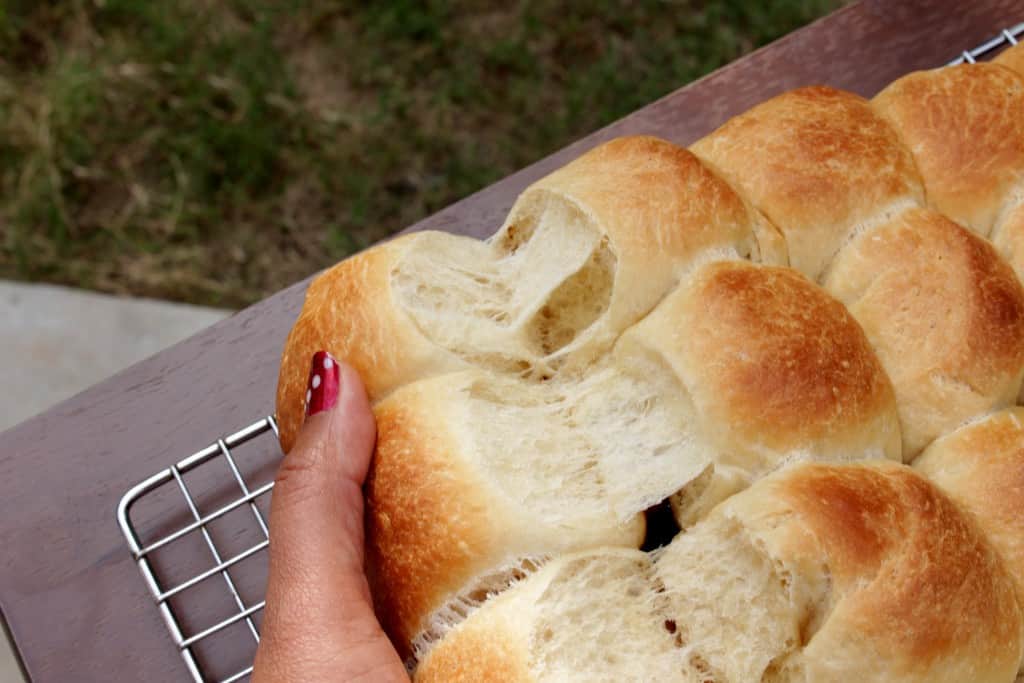
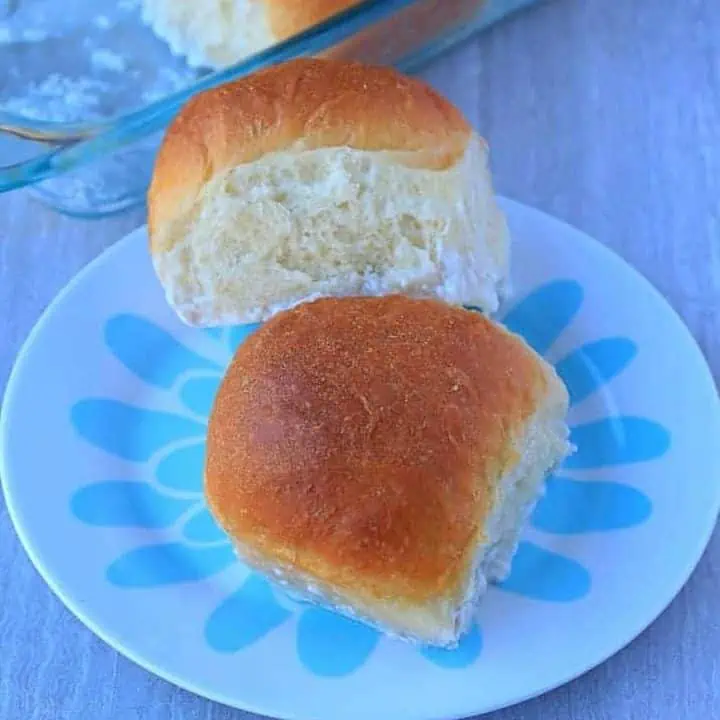
These Hawaiian Sweet Buns are something that I have bought many times, and I just love the mild fruity sweetness and the wonderful feathery texture of the Hawaiian Sweet Rolls.
I have many times avoided walking through the aisle where these King Hawaiian Sweet buns are, fearing that I might end up buying these. I was thinking of making these buns eggless, but then dropped the idea as I realized that if I had to get the feathery texture of the King's Hawaiian sweet buns, I would have to make them with enriched dough.

When I bake sweet buns, many thoughts run through my mind. I have a very close relationship with buns as it is one of my favorite ways to eat bread. I have made several trips to Adyar bakery to buy sweet buns for me and my mother.
It is one of her ever favorite things to eat and she would not miss a chance to eat them. I made the tutti frutti bakery-style buns a few months back, and it was quite close to the buns we get in the Adyar bakery.
I just wish I were able to bake these Hawaiian Sweet Buns for my mother. The other favorite recipe of my mother is the Classic Butter Croissant.

The mild fruity flavor of the Hawaiian sweet buns is from the pineapple juice that we add to the dough. I have made the buns very small, so my boys can eat them as snacks, but if preferred, you could make them slightly bigger. The smaller size is also so that I can control the number of buns I am eating.
One thing I have to mention about the dough is that it is extremely sticky. Do not be tempted to add more flour than needed as it could make the buns tough. Add flour just enough to bring it together as a dough.
I kneaded the dough in my stand mixer, and I added a couple of tablespoons of extra flour than mentioned to bring it all together. My dough was still sticking to the bottom of the mixer bowl, and I just scraped it off and formed a ball.

Preparation time - 25 minutes plus about 2 ½ to 3 hours of rising time
Baking time - 22 to 25 minutes
Difficulty level - medium
Recipe adapted from - KAF
Ingredients to make Hawaiian Sweet Buns - makes 24 small buns
For the sponge
- All-purpose flour - ¼ cup
- Instant yeast - 1 tbsp
- Water - 3 tablespoons (slightly warm)
For the dough
- All of the sponge
- All-purpose flour - 2 ¾ cups
- Salt - 1 ¼ tsp
- Brown sugar - ⅓ cup
- Butter - 4 tablespoons (softened)
- Pineapple juice - ½ cup
- Eggs - 2
- Vanilla - 1 tsp
For the glaze
- Milk - 2 tbsp
- Butter - 2 teaspoons (melted)
Step-by-Step Process
Making the Dough
- In the bowl of the mixer or a large bowl, add all of the sponge ingredients and mix. Keep it aside for 15 minutes to rest.
- Once the sponge has rested, add the pineapple juice, butter, brown sugar, eggs, and vanilla to it. Mix well with a whisk or with the flat beater attachment in the mixer.
- Run the mixer at medium speed for about 2 to 3 minutes to incorporate everything.
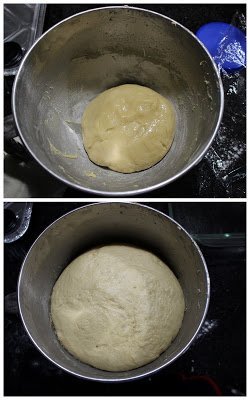
- In the meantime, sift together the flour and the salt. Add the flour gradually to the wet ingredients and mix well. The mixture would be very sticky and might not even form a dough. Keep mixing it with the flat beater for 2 more minutes and then switch to the dough hook.
- Start kneading the dough and continue for 7 to 8 minutes. If the dough does not form and appears very wet, add a couple of more tablespoons of flour. Keep in mind that this will be a sticky dough, but it should at least form a smooth dough. I needed the extra flour to bring it to the right consistency.

- Once the dough has been kneaded enough and it appears smooth and soft, stop kneading and transfer it to a well-greased large bowl. Cover the dough and let it rise for 1 ½ to 2 hours. The dough has to rise well over double its volume, so let it proof for about 2 hours.
Shaping the buns
- Lightly grease a 9 x 13 baking pan.
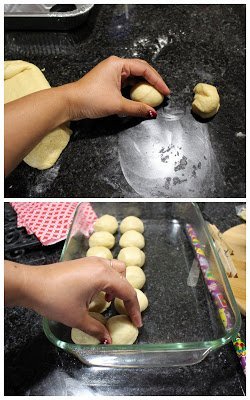
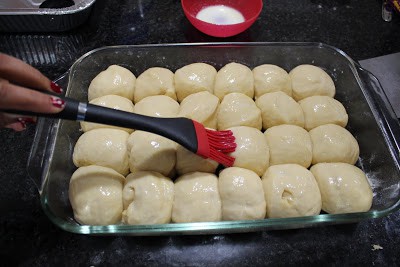
- Gently punch down the risen dough and divide it into 24 small pieces. I cut the dough in half and then once again in half. Then I cut each quarter into 6 pieces to yield 24 pieces.
- Roll the dough to form a smooth ball and line them up in the tray with some space in between.
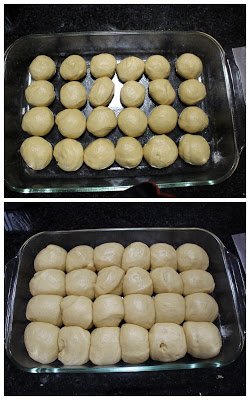
- Loosely cover the baking pan and then let it rise again for 45 minutes to an hour.
Baking the buns
- Preheat the oven to 350°F just before the dough has finished rising.
- Combine the milk and the butter for the glaze.
- Brush the risen buns liberally with the milk-butter mixture. This gives the buns a very nice color.
- Bake the buns for about 22 minutes or until it is golden brown evenly and sound hollow when tapped.
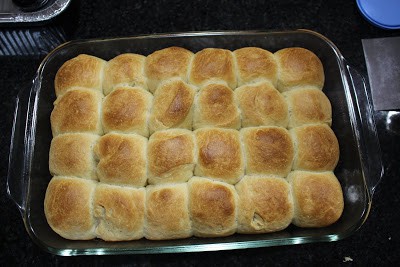
- Let it cool for about 10 minutes in the pan and then cool it down on a cooling rack.
- Serve the Hawaiian sweet Buns warm.

Expert Tips
- Make sure to start with active yeast. If the yeast is old and does not rise, the buns won't turn out as soft.
- The Hawaiian buns need to be made with an enriched dough for the feathery texture.
- Adding the pineapple juice gives the Hawaiian rolls a fruity, tropical flavor.
- The dough is extremely sticky. Do not be tempted to add more flour, or else the Hawaiian sweet rolls won't have the soft texture.
Frequently asked questions
Absolutely yes. We can freeze the Hawaiian buns just like any other dinner roll. Thaw it before serving. I also like to slightly warm the rolls in the microwave just before serving.
Make the dough and let it rise for the first time in the refrigerator. At this stage, you can freeze the dough as well. Make sure to remove it and let it come to room temperature entirely before shaping.
The texture of the Hawaiian rolls comes from the enriched dough. I will suggest not skipping the eggs to get the same soft texture.
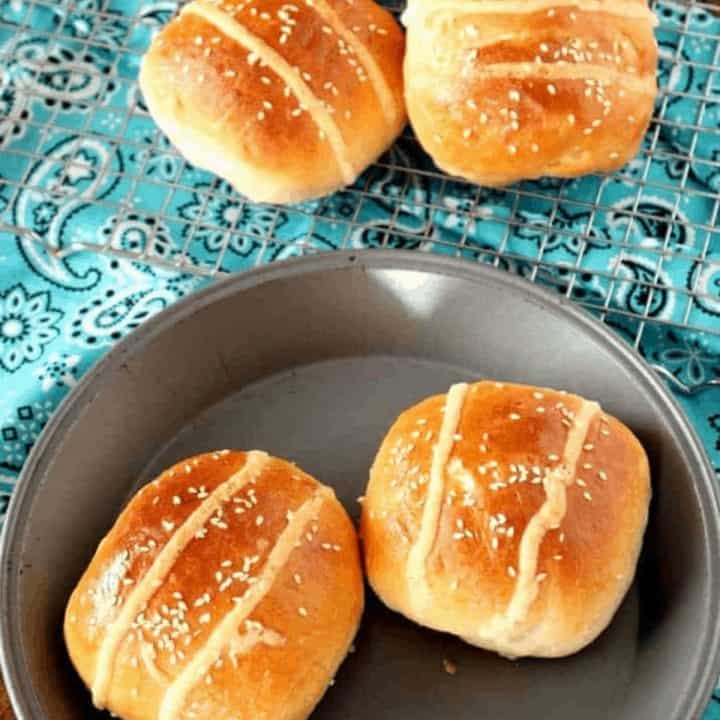
More buns and rolls

If you made this recipe and liked it, give a star rating on the recipe card or let me know in the comments below. You could also share it with me on Instagram using #MyCookingJourney and tagging me @sandhya.ramakrishnan. You could follow me and my recipes on Facebook |Instagram | Pinterest | Twitter/X
Recipe
Hawaiian Buns | King Hawaiian Sweet Buns | Hawaiian Sweet Rolls
Equipment
- bowl
- Mixer
- Baking Pan
- Oven
- Brush
- Wire rack
Ingredients
For the sponge
- ¼ cup All purpose flour
- 1 tablespoon Instant yeast
- 2 tablespoon Water slightly warm
For the dough
- All of the sponge
- 2¾ cup All purpose flour
- 1¼ teaspoon Salt
- ⅓ cup Brown sugar
- 4 tablespoon Butter softened
- ½ cup Pineapple juice
- 2 Eggs
- 1 teaspoon Vanilla
For the glaze
- 2 tablespoon Milk
- 2 teaspoon Butter melted
Instructions
Making the Dough -
- In the bowl of the mixer or in a large bowl, add all of the sponge ingredients and mix. Keep it aside for 15 minutes to rest.
- Once the sponge has rested, add the pineapple juice, butter, brown sugar, eggs and vanilla to it. Mix well with a whisk or with the flat beater attachment in the mixer.
- Run the mixer in medium speed for about 2 to 3 minutes to incorporate everything.
- In the meantime, sift together the flour and the salt. Add the flour gradually to the wet ingredients and mix well. The mixture would be very sticky and might not even form dough. Keep mixing it with the flat beater for 2 more minutes and then switch to the dough hook.
- Start kneading the dough and continue for 7 to 8 minutes. If the dough does not form and appears very wet, add couple of more tablespoons of flour. Keep in mind that this will be sticky dough, but it should at least form smooth dough. I needed the extra flour to bring it to the right consistency.
- Once the dough has been kneaded enough and it appears smooth and soft, stop kneading and transfer it to a well greased large bowl. Cover the dough and let it rise for 1 ½ to 2 hours. The dough has to rise well over double its volume so let it proof for about 2 hours.
Shaping the buns -
- Lightly grease a rectangle 9 x 13 baking pan.
- Gently punch down the risen dough and divide it into 24 small pieces. I cut the dough in half and then once again into half. Then I cut each quarter into 6 pieces to yield 24 pieces.
- Roll the dough to form a smooth ball and line them up in the tray with some space in between.
- Loosely cover the baking pan and then let it rise again for 45 minutes to an hour.
Baking the buns -
- Preheat the oven to 350 F just before the dough has finished rising.
- Combine the milk and the butter for the glaze.
- Brush the risen buns liberally with the milk-butter mixture. This gives the buns a very nice color.
- Bake the buns for about 22 minutes or until it is golden brown evenly and sounds hollow when tapped.
- Let it cool for about 10 minutes in the pan and then cool it down on a cooling rack.
- Serve the Hawaiian sweet Buns warm.
Notes
- Make sure to start with active yeast. If the yeast is old and does not rise, the buns won't turn out as soft.
- The Hawaiian buns need to be made with an enriched dough for the feathery texture.
- Adding the pineapple juice gives the Hawaiian rolls the fruity tropical flavor.
- The dough is extremely sticky. do not be tempted to add more flour or else the Hawaiian sweet rolls won't have the soft texture.

The buns are a little smaller than the store bought ones we got, but they turned out. My dough didn’t rise well until I put in in a warm place. You can turn on the oven just a little and then turn it off and then put the dough in for a good place to rise.
I also covered it with foil when I moved it to the oven, because I think the towel I tried covering it with let it dry out a little.
Thanks for the recipe! 🙂
Looking again, I’m not sure if they’re smaller or not. It could also be that I needed to let my dough rise longer. Thanks again!
Oh wow, these buns look fantastic! I can't wait to bake them now! Saved the recipe.. thanks!
Thank you Natalie!
These rolls looks so delicious and fluffy! I can't wait to try them out for myself
Thank you Beeb!
Wow sandhya! look at those soft and fluffy Hawaiian buns, i m definitely baking these for the weekend, i bet both my boys would go gaga!!!
OMG Those buns are looking so sinful Sandhya, I am bookmarking this!