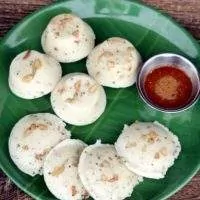
Kanchipuram Idli | Kancheepuram Idli | Kanchivaram Idli
I did not need to think for more than 5 minutes to decide that I was doing Kanchipuram Idli for K. They are also called Kancheepuram Idli or Kanchivaram Idli. I did not change this alphabet even once and made sure I was making it. This was something I wanted to try for a long time.
I have never personally eaten these Kanchivaram Idli but have heard a lot about how delicious it is from the temple. When researching the recipe, I landed on many different variations. Some had used only raw rice whereas some had used only idli rice.

That is when I read this article in The Hindu newspaper where they had given the different recipes they use in the temple and the other restaurants in Kancheepuram which are famous for serving this idli.
In the temple, since it is used as a prasadam for the god, they only use raw rice and not idli rice. In the restaurants though, they use the combination of both the rice. I also decided the same and hence used the recipe from the Rama's Café and Krishna Vilas, where they use equal quantities of raw rice and idli rice.
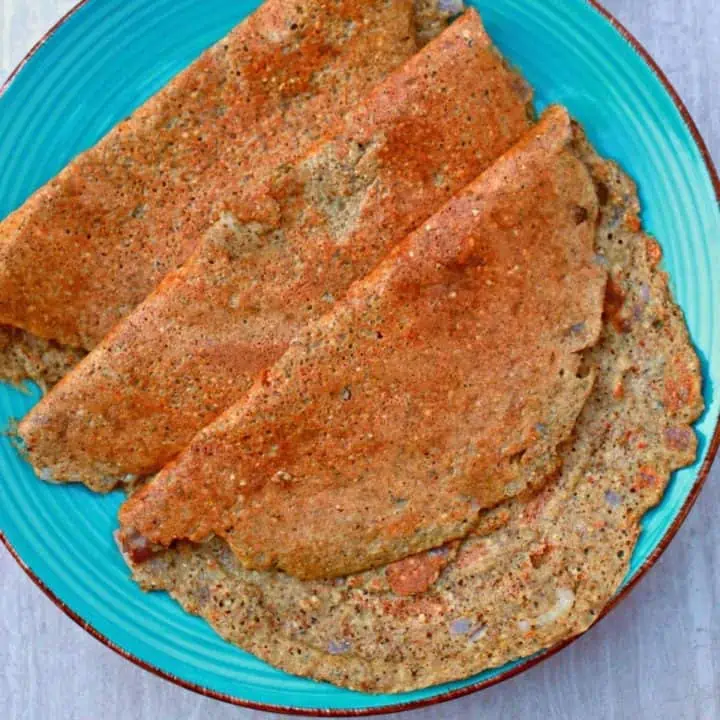
The seasoning ingredients though are almost similar and they all use pepper, cumin, and ginger (either fresh or dry). The Kancheepuram Idli is very heavy when compared to regular idli as they are usually made much larger in size.
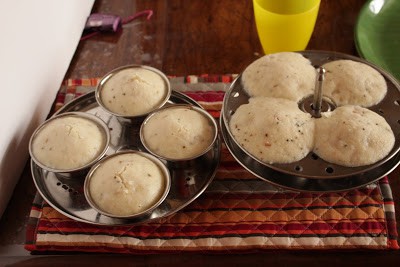
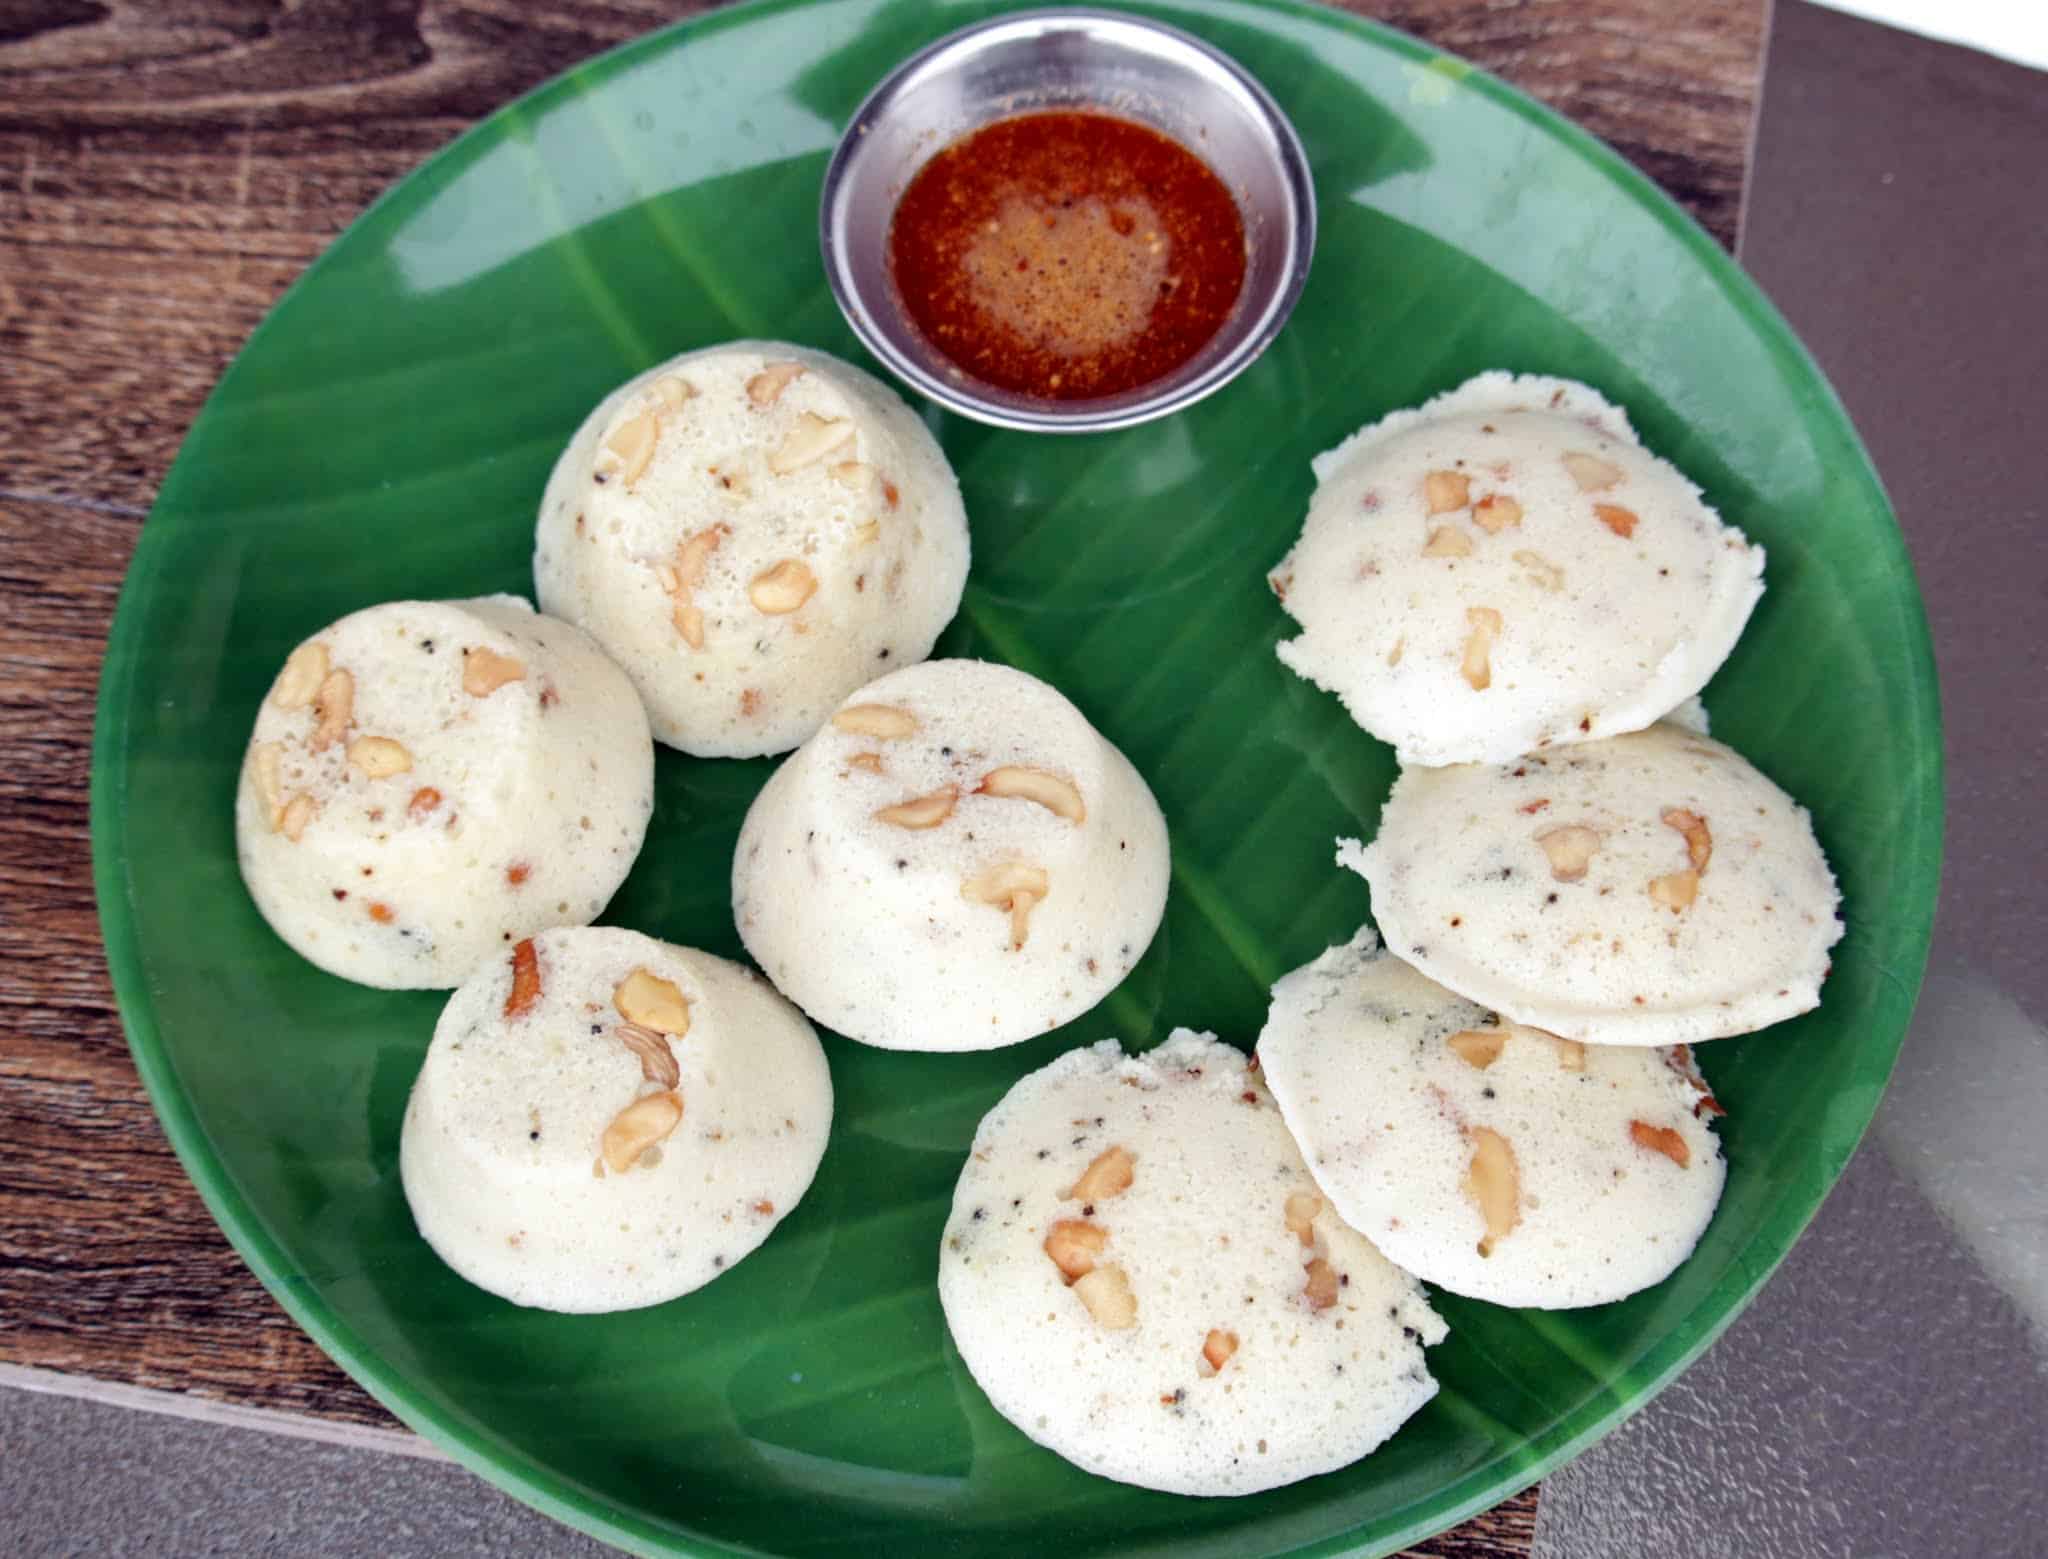
I read that they make foot-long idlis and then slice them and serve. I used small cups to make a few idli and then made the remaining in the regular idli plate.
We loved the spiciness of the idli that came from the pepper and the ginger powder made it very aromatic. I added some yogurt in the batter to give it some sourness but that can be skipped if your batter ferments quite well.
My other recipes from this series -
A - Athirasam
B - Badam Burfi
C - Chettinad Masala Cheeyam
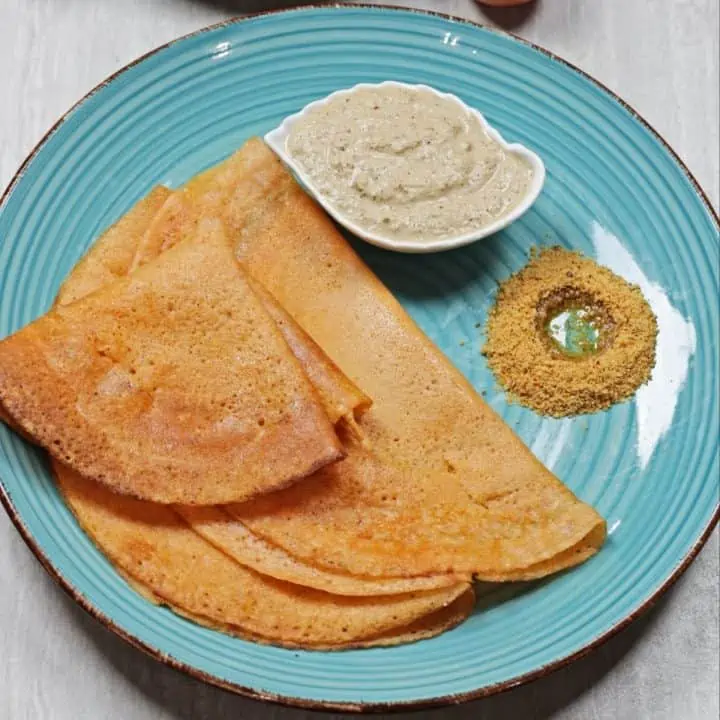
D - Dosai Milagai Podi
E - Ellu Urundai
F - Fruit Kesari
G - Godhumai Rava Pidi Kozhukattai
H - Homemade Rice flour
I - Inji Marappa
J - Jevvarisi Thengai Paal Payasam
Preparation time - 15 minutes plus 4 to 6 hours of soaking time and overnight (or more)fermenting time
Cooking time - about 15 to 18 minutes per batch
Difficulty level - easy
Recipe adapted from - The Hindu
Ingredients to make Kanchipuram Idli - Makes about 32 normal-sized idlis
- Raw Rice - 1 cup (I use Sona Masoori)
- Idli Rice - 1 cup
- Ullutham Paruppu / Urad dal - 1 cup
- Vendhayam / Fenugreek seeds - 1 tsp
- Sour yogurt - ½ cup
- Salt - to taste
To season the Kancheepuram Idli - (the quantity is for the whole batch of Idli batter)
- Oil or ghee - 3 tablespoons (preferably gingelly oil, if using oil)
- Kadugu / mustard seeds - 2 tsp
- Kadalai paruppu / Chana dal - 3 tsp
- Jeeragam / cumin seeds - 4 tsp
- Milagu / Black Pepper - 3 teaspoons (crushed coarsely)
- Curry leaves - a handful
- Sukku powder / Dry ginger powder - 1 tsp
- Asafetida - ½ tsp
- Cashew nuts - few

Procedure to make Kanchipuram Idli -
- Wash and soak both the rice, urad dal, and methi seeds together in water for about 4 hours.
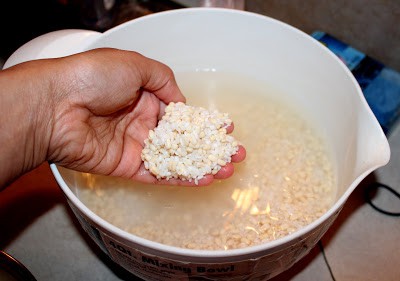
- Using the wet grinder, grind the soaked rice and dal into a coarse batter. Add a little water when grinding. The batter has to be thicker in consistency. Make sure you grind the batter coarser than you would for normal idli.

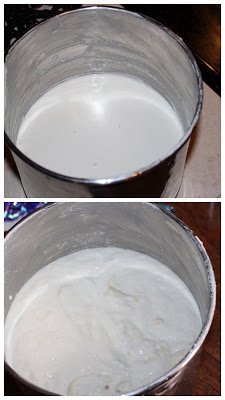
- Transfer the batter to a large container and add salt. Using your hands mix the batter well. My mother says that using my hands to mix the batter helps ferment it better and quicker.
- Let the batter ferment until it has risen well (about double). It could take 8 to 24 hours depending on how cold it is. Mine took about 24 hours.
- Once the batter has fermented, add the sour yogurt to it and mix. This just helps in getting an additional layer of sourness. This could be skipped if you don't have any.
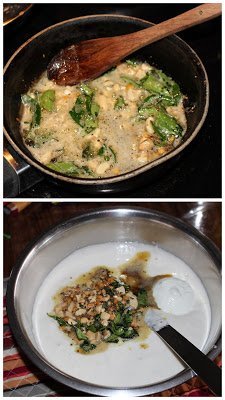
- In a pan, heat the ghee or oil. I used a combination of both. Fry all the ingredients mentioned in the seasoning. Add this to the batter and mix gently to combine.
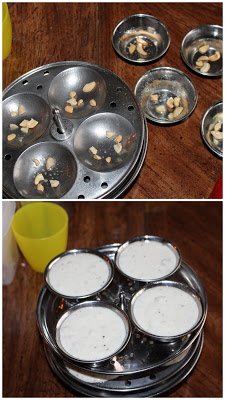
- Grease the idli plates or moulds and pour the batter. I just added a few cashew pieces and then poured the batter. I used small cups/bowls for a few and idli mould for a few. You could also use a deep plate to make these Kanchivaram Idli and then slice them into wedges.
- Steam the batter for about 15 to 18 minutes. The idli plates would be done in about 15 minutes, but the deeper the dish is, the longer it will take to cook. This Kanchivaram Idli takes longer than regular idlis to cook.
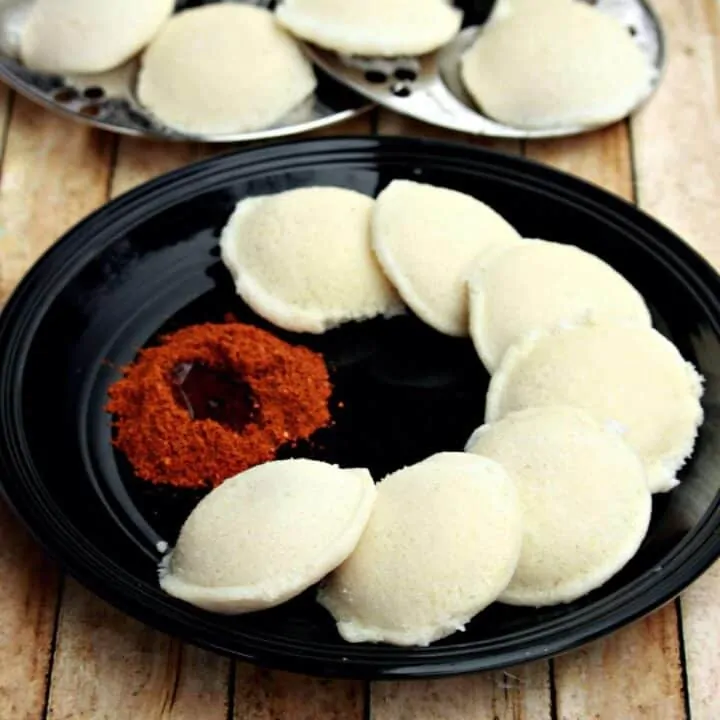
- Serve the Kanchipuram Idli with milagai podi or chutney. The idli is quite spicy and flavorful and just the milagai podi was enough for us.
Other Breakfast Ideas
If you made this recipe and liked it, give a star rating on the recipe card or let me know in the comments below. You could also share it with me on Instagram using #MyCookingJourney and tagging me @sandhya.ramakrishnan. You could follow me and my recipes on Facebook |Instagram | Pinterest | Twitter/X
Recipe
Kanchipuram Idli
Equipment
- Wet Grinder
Ingredients
- 1 cup Raw Rice I use Sona Masoori
- 1 cup Idli Rice
- 1 cup Ullutham Paruppu / Urad dal
- 1 teaspoon Vendhayam / Fenugreek seeds
- ½ cup Sour yogurt
- Salt to taste
To season - (the quantity is for the whole batch of Idli batter)
- 3 tablespoon Oil or ghee preferably gingelly oil, if using oil
- 2 teaspoon Kadugu / mustard seeds
- 3 teaspoon Kadalai paruppu / Chana dal
- 4 teaspoon Jeeragam / cumin seeds
- 3 teaspoon Milagu / Black Pepper crushed coarsely
- Curry leaves a handful
- 1 teaspoon Sukku powder / Dry ginger powder
- ½ teaspoon Asafetida
- Cashew nuts few
Instructions
- Wash and soak both the rice, urad dal and methi seeds together in water for about 4 hours.
- Using the wet grinder, grind the soaked rice and dal into a coarse batter. Add little water when grinding. The batter has to be thicker in consistency. Make sure you grind the batter coarser than you would for normal idli.
- Transfer the batter into a large container and add salt. Using your hands mix the batter well. My mother says that using hands to mix the batter helps in fermenting it better and quicker.
- Let the batter ferment until it has risen well (about double). It could take 8 to 24 hours depending on how cold it is. Mine took about 24 hours.
- Once the batter has fermented, add the sour yogurt to it and mix. This just helps in getting an additional layer of sourness. This could be skipped if you don't have any.
- In a pan, heat the ghee or oil. I used a combination of both. Fry all the ingredients mentioned under the seasoning. Add this to the batter and mix gently to combine.
- Grease the idli plates or moulds and pour the batter. I just added a few cashew pieces and then poured the batter. I used small cups/bowls for few and idli mould for few. You could also use a deep plate to make the idli and then slice them into wedges.
- Steam the batter for about 15 to 18 minutes. The idli plates would be done in about 15 minutes, but the deeper the dish is, the longer it will take to cook. This idli takes longer than regular idlis to cook.
- Serve the Kanchipuram Idli with milagai podi or chutney. The idli is quite spicy and flavorful and just the milagai podi was enough for us.
I have always relished Kanchipurum idlis in resturants never tried at home.. your recipe with details is very helpful.hopefully we can make these idlis in regular idli molds too? shall try it soon.
Kanchipuram Idlis --Sandhya your preparation is making me feel so hungry. I love kanchipuram idlis and it reminds me of how its served in Shiv Sagar, wrapped in a banana leaf. Just one is a meal on its own.
Oh my look at those cute, peppery idlies!!! i can imagine the tempering taste as i read through the post sandhya! one of my favorites, hope to eat it once at the temple!!!! super share!
I love Kanchipuram idlis.. They taste so good with all the ingredients added in the tadka. Miss my Chennai days .